8 How to Paint Snowy Skies
One of my favorite winter art projects uses bleeding tissue paper to create a lovely swirl of snowy skies with just the right mix of color.
All you need to do is overlap little squares of bleeding tissue paper on wet watercolor paper, wait a moment, and remove. The color left behind does all its magic.
You would think that a bunch of squares would leave geometric shapes behind, but instead, they swirl together and make a very soft mix of cool color.
I love that it keeps young ones from over mixing, which often happens with liquid or tray colors. You get a wonderful gradation from one shade to the next, no matter what your painting skill levels are like.
MATERIALS
• Watercolor paper, I recommend Strathmore
• Bleeding tissue paper• Sharpie marker, black, fine tip
• Water in container and brush
• Sharpie White paint marker, fine tip
• Watercolor paper, I recommend Strathmore
• Bleeding tissue paper• Sharpie marker, black, fine tip
• Water in container and brush
• Sharpie White paint marker, fine tip
DIRECTIONS
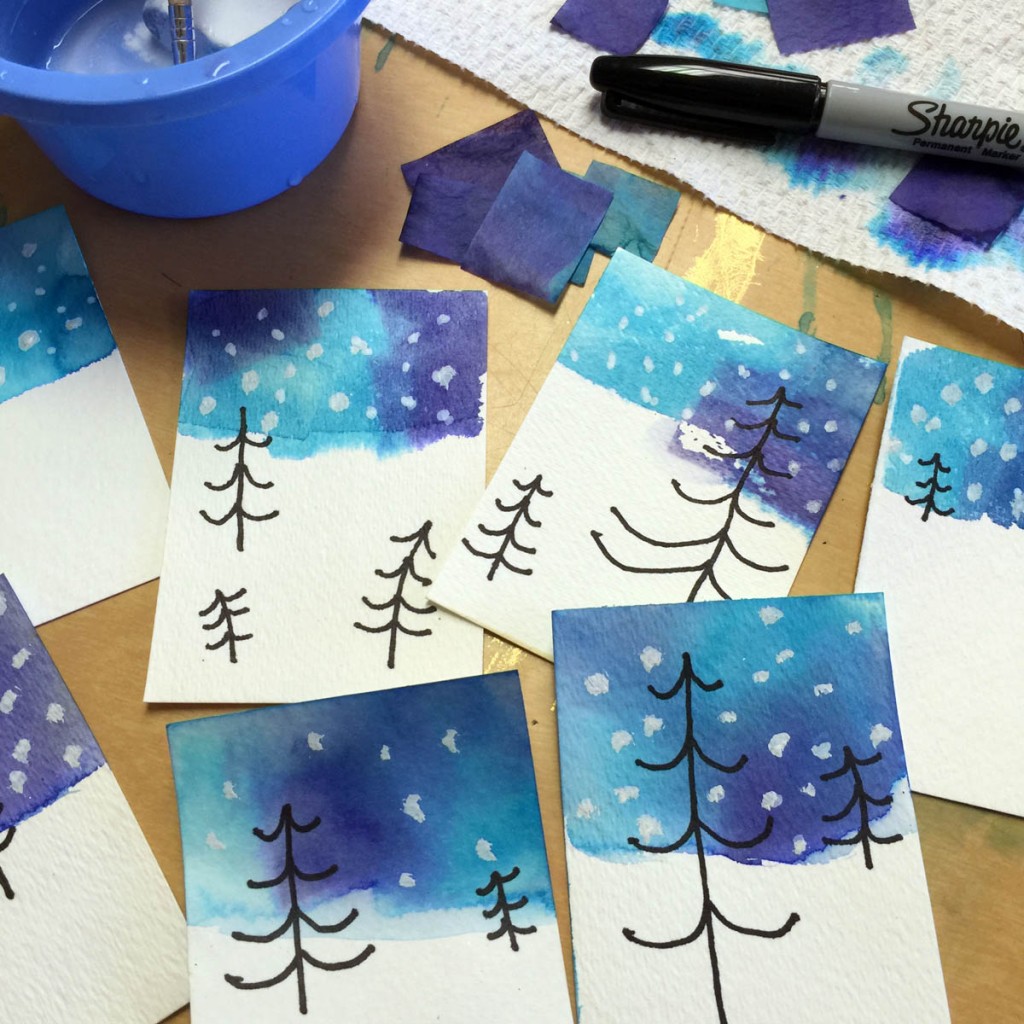
PREP: Cut watercolor paper to ATC size, if making cards (2.5″ x 3.5″)
Cut blue and purple tissue to 1″ squares or smaller, approximately
1. Students draw an assortment of line trees on the bottom of their cards. Some should be large, some small.
2. The sky is made from brushing water where it is desired, and placing an assortment of overlapping tissue squares on top. Let sit for about 5 minutes.
3. Carefully remove the tissue squares. Let dry.
4. Use a white Sharpie paint marker to add dots of snow in the sky.


Comments
Post a Comment